Family Tree DNA’s New Chromosome Browser

Family Tree DNA has released their new, updated chromosome browser with a completely new look and feel. It’s quite different from the previous version, so let’s take a test drive.

The first thing you notice is a new link on your personal page in the Family Finder section.

You can access the chromosome browser in one of two ways.

  • Matches button
  • Clicking on the Chromosome Browser button

Either way, you eventually get to the same place.

Matches

By viewing your matches, you can now select a total of 7 people, increased from 5 previously, to compare to you in the chromosome browser.

After selecting the people you want to view in the chromosome browser, click on the Chromosome Brower button above your matches, just like before.

Note that on your Matches page, the other tools, such as In Common With (ICW), Not In Common With (NICW), Search by name, Search by ancestral surname, the list of ancestral surnames for each match and other information is exactly where it has always been located. Nothing else changed on the Match page except your ability to select 7 people instead of just 5.

The Chromosome Browser

The new chromosome browser tool looks different. A lot different. It’s also much more intuitive.

If you make match selections on your match page and click the chromosome browser button, you see the following page reflecting your choices. The link no longer immediately compares the individuals in the chromosome browser.

Your match list is shown to the right of the selected individuals, shown at left.

This is also the page where you land if you click the Chromosome Browser button on your dashboard.

From Your Dashboard

If you don’t click on your Matches button first, and click directly on the Chromosome Browser button, this is what you’ll see.

Your matches are shown at right, and when you select them, they will appear on the list at left.

Select as many as 7. You’ll see them appear to the left as you make your selections.

Features

To aid in your selection, you can utilize the filter above the matches to view only specific levels of matches.

The “name search,” at upper right, searches for an individual match with that first or last name.

However, if you enter the full name, it finds that individual person, so if you know you want to compare Uncle Rex Doe’s kit, you just search for his name as Rex, Doe or Rex Doe.

This page does NOT search the ancestral surnames. If you want to do that, you need to work from the matches page which does search for people with that ancestral surname in their Ancestral Surname List.

I’m very glad to see this new search feature for matches at the browser level. It makes searching for a particular match a LOT easier.

Notice that not all of the match information is available on this page. X matching, match date, linked relationships and ancestral surnames are only available on the Matches page.

The icons for contacting matches, notes and the tree are also only available on the Matches page.

However, a new field is available here, the number of shared segments. This number includes segments to the 1cM level so long as they are 500 SNPs or larger. For most (nonresearch) purposes, I generally use segments of 7cM or larger, although I do sometimes want to see smaller segments.

At right, the In Common With and Not In Common With functions are available by clicking on the three dots:

In Common With and Not In Common With

The In Common With (ICW) and Not In Common With (NICW) features have been greatly improved.

By selecting an individual, such as William Sterling Estes in this example, then clicking the In Common With (ICW) link, I see all of the people I match in common with William Sterling Estes. Furthermore, the system now automatically puts William Sterling Estes into my match list. By making additional selections from that ICW list and adding them to the list, I can then easily compare my DNA, that of William Sterling Estes and the people that we both match to determine if we have common matching chromosome segments.

The Not In Common With feature works exactly the same way.

Compare

To view the new chromosome browser, click on the orange compare button at the bottom of the list. It’s so large you can’t miss it!

Chromosome Browser Format

The new chromosome browser itself looks a LOT different. To begin with, the color and design of the chromosomes themselves has changed. There is now space for 7 people in the comparison on each chromosome, plus you as the “background” person that those 7 are being compared to.

Chromosomes 1-5 with 7 matches being compared to me are shown below. At the top of the page, the colors of the segments are coded by the colors at the top of the profile placards of the matches I selected.

You can view information about any individual by clicking on their profile button.

By clicking on the Update Selected Matches button, at right above the chromosomes, you can change the individuals being compared.

Now, let’s take a look at how to interpret these matches.

Reading the Results

As before, the centromere is notated by the little white “waists” in each chromosome, and the light grey represents regions not tested, so you won’t see matches there.

Please note that you can click any image to enlarge.

Notice Charlene, the navy blue person match on my chromosome 1.

Reading left to right, we have:

  • At the beginning of the chromosome, dark grey tested region with no match
  • Beginning with the red box, navy blue match region
  • Light grey untested region, crossing centromere and continuing until small navy blue region
  • The entire small tested region is navy blue, indicating a match
  • Small light grey untested region
  • Dark grey tested region that does not match
  • Navy blue region that does match to the end of the red box
  • Dark grey tested region that does not match to the end of the chromosome

We would read this as 2 matching segments, not 3, with the first large navy segment and the tiny middle navy segment forming one contiguous segment across the centromere and untested regions. The third navy part of that chromosome is a separate matching segment, because it’s separated from the first two by a darker grey area that is tested but does not match.

By positioning your cursor over the colored portions of the chromosome, and waiting for a second or so, the information about that specific segment will appear.

Please note that you can click to enlarge any graphic.

Downloading Just These Matching Segments

Clicking on Download Segments, the blue link at right just above chromosome 1 downloads just the information in a csv file for the people currently being compared in the browser. It does not download all of your matches. That feature is elsewhere.

Options

The default minimum centiMorgans display view is still 5, and you can select 1, 5, 7 or 10. All matches displayed are 500 SNPs or larger.

Detailed Segment Data

Another new feature is the Detailed Segment Data tab. Click to view.

In essence, this is the same information as the csv download file, except you don’t have to download the file and you don’t have to know anything about Excel. However, you can’t sort this data by chromosome like you can in a spreadsheet.

You can select which DNA match you wish to view, one by one.

I hope that Family Tree DNA will add the feature of being able to sort each column.

Downloading All Matches

For those interested in downloading all matches, not just the matches displayed, you can perform that function at the bottom of your matches page:

Or at the bottom of the initial Chromosome Browser selection page, but BEFORE you click on compare.

Quick Reference Feature Navigation Chart

I’m always grateful for new features and updates, but sometimes new features feel a bit like someone rearranged the furniture in the room while you were sleeping. I’ve created a quick reference chart to show you what’s available where and to help you navigate.

Summary

I like the updated chromosome browser as well as the new In Common With feature. The new browser facilitates 7 comparisons at once and is a LOT more user friend with new ease-of-use features. The new ICW page eliminates several steps and confusion that exists when trying to use the function from the Matches page.

I’m hoping that this update is a new skin in preparation for more nifty new features, such as triangulation. Hint, hint, Family Tree DNA. Christmas is coming😊

______________________________________________________________

Disclosure

I receive a small contribution when you click on some of the links to vendors in my articles. This does NOT increase the price you pay but helps me to keep the lights on and this informational blog free for everyone. Please click on the links in the articles or to the vendors below if you are purchasing products or DNA testing.

Thank you so much.

DNA Purchases and Free Transfers

Genealogy Services

Genealogy Research

Family Tree DNA’s Mitochondrial Haplotree

On September 27th, 2018 Family Tree DNA published the largest Y haplotree in the world, based on SNP tests taken by customers. Now, less than two weeks later, they’ve added an exhaustive mitochondrial DNA (mtDNA) public haplotree as well, making this information universally available to everyone.

Family Tree DNA’s mtDNA Haplotree is based on the latest version of the mtDNA Phylotree. The new Family Tree DNA tree includes 5,434 branches derived from more than 150,000 full sequence results from 180+ different countries of origin. Family Tree DNA‘s tree has SIX TIMES more samples than the Phylotree. Furthermore, Family Tree DNA only includes full sequence results, where Phylotree includes partial results.

This new tree is a goldmine! What does it provide that that’s unique? Locations – lots of locations!

The Official Phylotree

Unlike the Y DNA tree, which is literally defined and constructed by the genetic community, new mitochondrial DNA branches cannot be added to the official mitochondrial Phylotree by Family Tree DNA. Haplogroups, meaning new branches in the form of SNPs are added to the Y tree as new SNPs are discovered and inserted into the tree in their proper location. The mitochondrial DNA phylotree can’t be expanded by a vendor in that manner.

The official mitochondrial Phylotree is maintained at www.phylotree.org and is episodically updated. The most recent version was mtDNA tree build 17, published and updated in February 2016. You can view version history here.

Mitochondrial Phylogenic Tree Version 17

Version 17 of the official mitochondrial tree consists of approximately 5,400 nodes, or branches with a total of 24,275 samples uploaded by both private individuals and academic researchers which are then utilized to define haplogroup branches.

Individuals can upload their own full sequence results from Family Tree DNA, but they must be in a specific format. I keep meaning to write detailed instructions about how to submit your full sequence test results, but so far, that has repeatedly slipped off of the schedule. I’ll try to do this soon.

In a nutshell, download your FASTA file from Family Tree DNA and continue with the submission process here. The instructions are below the submission box, so scroll down.

In any case, the way that new branches are added to the phylotree is when enough new results with a specific mutation are submitted and evaluated, the tree will have a new branch added in the next version. That magic number of individuals with the same mutation was 3 in the past, but now that so many more people are testing, I’m not sure if that number holds, or if it should. Spontaneous mutations can and do happen at the same location. The Phylotree branches mean that the haplogroup defining mutations indicate a common ancestor, not de novo separate mutations. That’s why analysis has to be completed on each candidate branch.

How do Mitochondrial DNA Branches Work?

If you are a member of haplogroup J1c2f today, and a certain number of people in that haplogroup have another common mutation, that new mutation may be assigned the designation of 1, as in J1c2f1, where anyone in haplogroup J1c2f who has that mutation will be assigned to J1c2f1.

While the alternating letter/number format is very easy to follow, some problems and challenges do exist with the alternating letter/number haplogroup naming system.

The Name of the Game

The letter number system works fine if not many new branches are added, branches don’t shuffle and if the growth is slow. However, that’s not the case anymore.

If you recall, back in July of 2012, which is equivalent to the genetic dark ages (I know, right), the Y tree was also represented with the same type of letter number terminology used on the mitochondrial tree today.

For example, Y DNA haplogroup R-M269 was known as R1b1a2, and before that the same haplogroup was known as R1b1c. The changes occurred because so many new haplgroups were being discovered that a new sprout wasn’t added from time to time, but entire branches had to be sawed off and either discarded or grafted elsewhere. It became obvious that while the R1b1a2 version was nice, because it was visually obvious that R1b1a2a was just one step below R1b1a2, that long term, that format just wasn’t going to be able to work anymore. New branches weren’t just sprouting, wholesale shuffling was occurring. Believe it or not, we’re still on the frontier of genetic science.

In 2012, the change to the SNP based haplogroup designations was introduced by Family Tree DNA, and adopted within the community.

The ISOGG tree, the only tree that still includes the older letter/number system and creates extended letter number haplogroup names as new SNPs are added provides us with an example of how much the Y tree has grown.

You can see that the letter/number format haplogroups to the far right are 19 locations in length. The assigned SNP or SNPs associated with that haplogroup are shown as well. Those 19-digit haplogroup names are just too unwieldy, and new haplogroups are still being discovered daily.

It’s 2012 All Over Again

That’s where we are with mitochondrial DNA today, but unlike Y DNA naming, a vendor can’t just make that change to a terminal SNP based naming system because all vendors conform to the published Phylotree.

However, in this case, the vendor, Family Tree DNA has more than 6 times the number of full sequence mitochondrial results than the mitochondrial reference model Phylotree. If you look at the haplogroup projects at Family Tree DNA, you’ll notice that (some) administrators routinely group results by a specific mutation that is found within a named haplogroup, meaning that the people with the mutation form a subgroup that they believe is worthy of its own haplogroup subgroup name. The problem is that unless enough people upload their results to Phylotree, that subgroup will never be identified, so a new haplogroup won’t be added.

If the entire Family Tree DNA data base were to be uploaded to Phylotree, can you imagine how many new haplogroups would need to be formed? Of course, Family Tree DNA can’t do that, but individual testers can and should.

Challenges for Vendors

The challenge for vendors is that every time the phylotree tree is updated and a new version is produced, the vendors must “rerun” their existing tester samples against the new haplogroup defining mutations to update their testers’ haplogroup results.

In some cases, entire haplogroups are obsoleted and branches moved, so it’s not a simple matter of just adding a single letter or digit. Rearranging occurs, and will occur more and more, the more tests that are uploaded to Phylotree.

For example, in the Phylotree V17 update, haplogroup A4a1 became A1a. In other words, some haplogroups became entirely obsolete and were inserted onto other branches of the tree.

In the current version of the Phylotree, haplogroup A4 has been retired.

Keep in mind that all haplogroup assignments are the cumulative combination of all of the upstream direct haplogroups. That means that haplogroup A4a1, in the prior version, had all of the haplogroup defining mutations shown in bold in the chart below. In the V17 version, haplogroup A1a contains all of the mutations shown in bold red. You might notice that the haplogroup A4 defining mutation T16362C is no longer included, and haplogroup A4, plus all 9 downstream haplogroups which were previously dependent on T16362C have been retired. A4a1 is now A1a.

Taking a look at the mitochondrial tree in pedigree fashion, we can see haplogroup A4a1 in Build 15 from September 2012, below.

Followed by haplogroup A1a in the current Build 17.

Full Sequence Versus Chip Based Mitochondrial Testing

While Family Tree DNA tests the full sequence of their customers who purchase that level of testing, other vendors don’t, and these changes wreak havoc for those vendors, and for compatibility for customer attempting to compare between data bases and information from different vendors.

That means that without knowing which version of Phylotree a vendor currently uses, you may not be able to compare meaningfully with another user, depending on changes that occurred that haplogroup between versions. You also need to know which vendor each person utilized for testing and if that vendor’s mitochondrial results are generated from an autosomal style chip or are actually a full mitochondrial sequence test. Utilizing the ISOGG mtDNA testing comparison chart, here’s a cheat sheet.

Vendor No Mitochondrial Chip based haplogroup only mitochondrial Full Sequence mitochondrial
Family Tree DNA No Yes – V17
23andMe Yes – Build V7 No
Ancestry None
LivingDNA Yes – Build V17 No
MyHeritage None
Genographic V2 Yes – Build V16 No

Of the chip-based vendors, 23andMe is the most out of date, with V7 extending back to November of 2009. The Genographic Project has done the best job of updating from previous versions. LivingDNA entered the marketplace in 2016, utilizing V17 when they began.

Family Tree DNA’s mitochondrial test is not autosomal chip based, so they don’t encounter the problem of not having tested needed locations because they test all locations. They have upgraded their customers several times over the years, with the current version being V17.

Family Tree DNA’s mitochondrial DNA test is a separate test from their Family Finder autosomal test while the chip-based vendors provide a base-level haplogroup designation that is included in their autosomal product. However, for chip-based vendors, updating that information can be very challenging, especially when significant branch changes occur.

Let’s take a closer look.

Challenges for Autosomal Chip-Based Vendors Providing Mitochondrial Results

SNP based mitochondrial and Y DNA testing for basic haplogroups that some vendors include with autosomal DNA is a mixed blessing. The up side, you receive a basic haplogroup. The down aide, the vendor doesn’t test anyplace near all of the 16,569 mitochondrial DNA SNP locations.

I wrote in detail about how this works in the article, Haplogroup Comparisons Between Family Tree DNA and 23andMe. Since that time, LivingDNA has also added some level of haplogroup reporting through autosomal testing.

How does this work?

Let’s say that a vendor tests approximately 4000 mitochondrial DNA SNPs on the autosomal chip that you submit for autosomal DNA testing. First, that’s 4000 locations they can’t use for autosomal SNPs, because a DNA chip has a finite number of locations that can be utilized.

Secondly, and more importantly, it’s devilishly difficult to “predict” haplogroups at a detailed level correctly. Therefore, some customers receive a partial haplogroup, such as J1c, and some receive more detail.

It’s even more difficult, sometimes impossible, to update haplogroups when new Phylotree versions are released.

Why is Haplogroup Prediction and Updating so Difficult?

The full mitochondrial DNA sequence is 16,569 locations in length, plus or minus insertions and deletions. The full sequence test does exactly what that name implies, tests every single location.

Now, let’s say, by way of example, that location 10,000 isn’t used to determine any haplogroup today, so the chip-based vendors don’t test it. They only have room for 4000 of those locations on their chip, so they must use them wisely. They aren’t about to waste one of those 4000 spaces on a location that isn’t utilized in haplogroup determination.

Let’s say in the next release, V2, that location 10,000 is now used for just one haplogroup definition, but the haplogroup assignment still works without it. In other words, previously to define that haplogroup, location 9000 was used, and now a specific value at location 10,000 has been added. Assuming you have the correct value at 9,000, you’re still golden, even if the vendor doesn’t test location 10,000. No problem.

However, in V3, now there are new haplogroup subgroups in two different branches that use location 10,000 as a terminal SNP. A terminal SNP is the last SNP in line that define your results most granularly. In haplogroup J1c2f, the SNP(s) that define the f are my terminal SNPs. But if the vendor doesn’t test location 10,000, then the mutation there can’t be used to determine my terminal SNP, and my full haplogroup will be incomplete. What now?

If location 10,000 isn’t tested, the vendor can’t assign those new haplogroups, and if any other haplogroup branch is dependent on this SNP location, they can’t be assigned correctly either. Changes between releases are cumulative, so the more new releases, the further behind the haplogroup designations become.

Multiple problems exist:

  • Even if those vendors were to recalculate their customer’s results to update haplogroups, they can’t report on locations they never tested, so their haplogroup assignments become increasingly outdated.
  • To update your haplogroup when new locations need to be tested, the vendor would have to actually rerun your actual DNA test itself, NOT just update your results in the data base. They can’t update results for locations they didn’t test.
  • Without running the full mitochondrial sequence, the haplogroup can never be more current than the locations on the vendor’s chip at the time the actual DNA test is run.
  • No vendor runs a full sequence test on an autosomal chip. A full mitochondrial sequence test at Family Tree DNA is required for that.
  • Furthermore, results matching can’t be performed without the type of test performed at Family Tree DNA, because people carry mutations other than haplogroup defining mutations. Haplogroup only information is entertaining and can sometimes provide you with base information about the origins of your ancestor (Native, African, European, Asian,) but quickly loses its appeal because it’s not specific, can’t be used for matching and can’t reliably be upgraded.

The lack of complete testing also means that while Family Tree DNA can publish this type of tree and contribute to science, the other vendors can’t.

Let’s take a look at Family Tree DNA’s new tree.
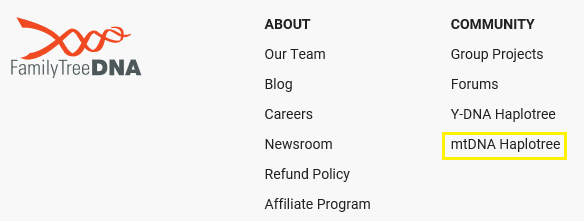
Finding the Tree

To view the tree, click here, but do NOT sign in to your account. Simply scroll to the bottom of the page where you will see the options for both the Y DNA Haplotree and the mtDNA Haplotree under the Community heading.

Click on mtDNA Haplotree.

If you are a Family Tree DNA customer, you can view both the Y and mitochondrial trees from your personal page as well. You don’t have to have taken either the Y or mitochondrial DNA tests to view the trees.

Browsing the mtDNA Tree

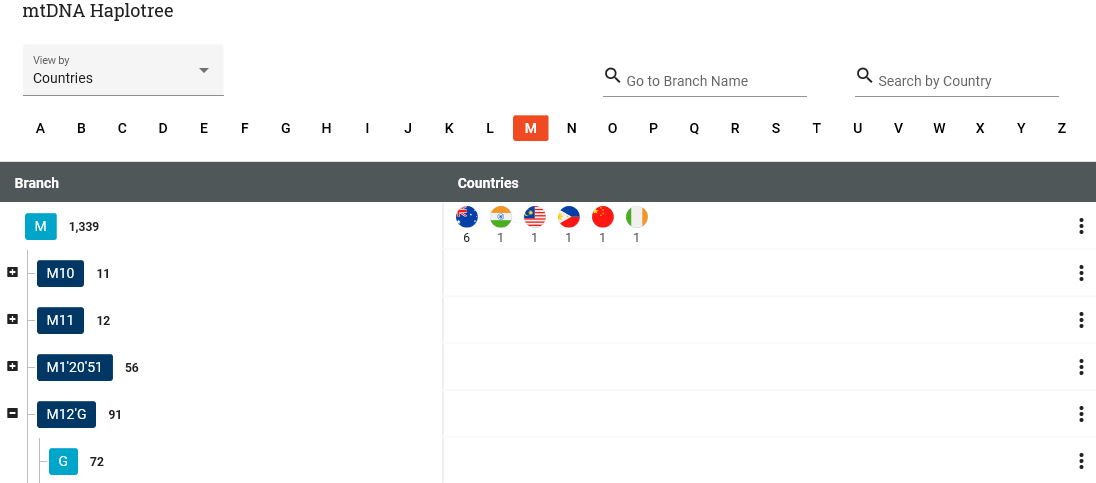
Across the top, you’ll see the major haplogroups.

I’m using haplogroup M as an example, because it’s far up the tree and has lots of subgroups. Only full sequence results are shown on the tree.

The basic functionality of the new mitochondrial tree, meaning how it works, is the same as the Y tree, which I wrote about in the Family Tree DNA’s PUBLIC Y DNA Haplotree.

You can view the tree in two formats, countries or variants, in the upper left-hand corner. View is not the same thing as search.

When viewing the mitochondrial DNA phylotree by country, we see that haplogroup M has a total of 1339 entries, which means M and everything below M on the tree.

However, the flags showing in the M row are only for people whose full mitochondrial sequence puts them into M directly, with no subgroup.

As you can see, there are only 12: 6 people in Australia, and one in 5 other countries. These are the locations of the most distant known ancestor of those testers. If they have not completed the maternal Country of Origin on the Earliest Known Ancestor tab, nothing shows for the location.

Viewing the tree by variant shows the haplogroup defining mutations, but NOT any individual mutations beyond those that are haplogroup defining.

For each haplogroup, click on the three dots to the right to display the country report for that haplogroup.

The Country Report

The Country Report provides three columns.

The column titled Branch Participants M shows only the total of people in haplogroup M itself, with no upstream or downstream results, meaning excluding M1, M2, etc. Just the individuals in M itself. Be sure to note that there may be multiple pages to click through, at bottom right.

The second column, Downstream Participants – M and Downstream (Excluding other Letters) means the people in haplogroup M and M subclades. You may wonder why this column is included, but realize that branches of haplogroup M include haplogroups G, Q, C, Z, D and E. The middle column only includes M and subgroups that begin with M, without the others, meaning M, M10, M11 but not G, Q, etc.

Of course the final column, All Downstream Participants – M and Downstream (Including other Letters) shows all of the haplogroup M participants, meaning M and all subclades, including all other haplogroups beneath M, such as M10, G, Q, etc..

What Can I Do with This Information?

Unlike the companion Y tree DNA, since surnames change every generation for maternal lineages, there is no requirement to have multiple matching surnames on a branch to be displayed.

Therefore, every person who includes a location for a most distant known ancestor is included in the tree, but surnames are not.

I want to see, at a glance, where the other people in my haplogroup, and the haplogroups that are the “direct ancestral line” of mine are found today. Clusters may mean something genealogically or are at least historically important – and I’ll never be able to view that information any other way. In fact, before this tree was published, I wasn’t able to see this at all. Way to go Family Tree DNA!!

It’s very unlikely that I’ll match every person in my haplogroup – but the history of that haplogroup and all of the participants in that haplogroup are important to that historical lineage of my family. At one time, these people all shared one ancestor and determining when and where that person lived is relevant to my family story.

Searching for Your Haplogroup

I’m searching for haplogroup J1c2f by entering J1c2f in the “Go to Branch Name.”

There it is.

I can see that there are 17 people in Sweden, 13 in Norway, 5 in Germany, 3 in Russia, etc. What’s with the Scandinavian cluster? My most distant known ancestor was found in Germany. There’s something to be learned here that existing records can’t tell me!

The mother branch is J1c2 which shows the majority of individuals in Ireland followed by England. This probably suggests that while J1c2f may have been born in Scandinavia, J1c2 probably was not. According to the supplement to Dr. Doron Behar’s paper, A “Copernican” Reassessment of the Human Mitochondrial DNA tree from its Root, which provides ages for some mitochondrial DNA haplogroups:

Haplogroup How Old Standard Deviation Approximate Age Range in Years
J1c2 9762 2010 7,752 – 11,772
J1c2f 1926 3128 500 – 5,054

I happen to know from communicating with my matches that the haplogroup J1c2f was born more than 500 years ago because my Scandinavian mito-cousins know where their J1c2f cousin was then, and so do I. Mine was in Germany, so we know our common ancestor existed sometime before that 500 year window, and based on our mutations and the mutation tree we created, probably substantially before that 500 year threshold.

Given that J1c2, which doesn’t appear to have been born in Scandinavia is at least 7,700 years old, we can pretty safely conclude that my ancestor wasn’t in Scandinavia roughly 9,000 years ago, but was perhaps 2,000 years, ago when J1c2f was born. What types of population migration and movement happened between 2,000 and 9,000 years ago which would have potentially been responsible for the migration of a people from someplace in Europe into Scandinavia.

The first hint might be that in the Nordic Bronze Age, trade with European cultures became evident, which of course means that traders themselves were present. Scandinavian petroglyphs dating from that era depict ships and art works from as far away as Greece and Egypt have been found.

The climate in Scandinavia was warm during this period, but later deteriorated, pushing the Germanic tribes southward into continental Europe about 3000 years ago. Scandinavian influence was found in eastern Europe, and numerous Germanic tribes claimed Scandinavian origins 2000 years ago, including the Bergundians, Goths, Heruls and Lombards.

Hmmm, that might also explain how my mitochondrial DNA, in the form of my most distant known ancestor arrived in Germany, as well as the distribution into Poland.

Is this my family history? I don’t know for sure, but I do know that the clustering information on the new phylotree provides me with clustering data to direct my search for a historical connection.

What Can You Do?

  • Take a full mitochondrial DNA test. Click here if you’d like to order a test or if you need to upgrade your current test.
  • Enter your Earliest Known Ancestor on the Genealogy tab of your Account Information, accessed by clicking the “Manage Personal Information” beneath your profile photo on your personal page.

The next few steps aren’t related to actually having your results displayed on the phylotree, but they are important to taking full advantage of the power of testing.

  • While viewing your account information, click on the Privacy and Sharing tab, and select to participate in matching, under Matching Preferences.

  • Also consent to Group Project Sharing AND allow your group project administrators to view your full sequence matches so that they can group you properly in any projects that you join. You full sequence mutations will never be shown publicly, only to administrators.

Of course, always click on save when you’re finished.

  • Enter your most distant ancestor information on your Matches Map page by clicking on the “Update Ancestor’s Location” beneath the map.

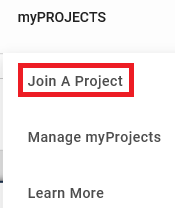
  • Join a project relevant to your haplogroup, such as the J project for haplogroup J. To join a project, click on myProjects at the top of the page, then on Join Projects.

  • To view available haplogroup projects, scroll down to the bottom of the screen that shows you available projects to join, and click on the letter of your haplogroup in the MTDNA Haplogroup Projects section.

  • Locate the applicable haplogroup, then click through to join the project.

These steps assure that you’ve maximized the benefits of your mitochondrial results for your own research and to your matches as well. Collaborative effort in completing geographic and known ancestor information means that we can all make discoveries.

The article, Working with Mitochondrial DNA Results steps you through you all of the various tools provided to Family Tree DNA testers.

Now, go and see who you match, where your closest matches cluster, and on the new mtDNA Haplotree, what kind of historical ancestral history your locations may reveal. What’s waiting for you?

______________________________________________________________

Disclosure

I receive a small contribution when you click on some of the links to vendors in my articles. This does NOT increase the price you pay but helps me to keep the lights on and this informational blog free for everyone. Please click on the links in the articles or to the vendors below if you are purchasing products or DNA testing.

Thank you so much.

DNA Purchases and Free Transfers

Genealogy Services

Genealogy Research

MyHeritage Step by Step Guide: How to Upload-Download DNA Files

In this Upload-Download Series, we’ll cover each major vendor:

  • How to download raw data files from the vendor
  • How to upload raw data files to the vendor, if possible
  • Other mainstream vendors where you can upload this vendor’s files

You can both upload autosomal DNA raw data files from another vendor to MyHeritage, and download your DNA file from MyHeritage. Please note that downloading a copy of your raw data file from any vendor does not interfere with your matches at that vendor.

Uploading TO MyHeritage

Upload Step 1

To upload your DNA to MyHeritage, click here and then click on the purple “Start” button.

Upload Step 1 If You Already Have an Account at MyHeritage

If you already have an account, click here to sign in and then click on the DNA tab to display the “Upload DNA Data” option which displays the graphic above. Click on the purple “Start” button. This is the same process you’ll use whether it’s the first time you’ve uploaded a kit, or you’re uploading subsequent kits to your account that you’ll be managing.

At this point, you’ll see the “Upload DNA data” screen – sp click on the purple “Start” button. .

Upload Step 2

If you’re not a member, you’ll be prompted to create a free account by entering your name, e-mail, and password, and from there you can upload your autosomal DNA file.

You’ll be asked whose DNA you’re uploading and prompted to read and agree to the terms of service and consent.

Click the purple upload button.

Then click done when the file is finished uploading.

You’ll be notified by e-mail within a couple days when the file is finished processing.

Downloading FROM MyHeritage

Download Step 1

Sign on to your MyHeritage account.

Click on DNA on the upper toolbar.

The dropdown menu includes “Manage DNA Kits”

Download Step 2

At the right of the kit you wish to download, click on the three small dots which will include an option for “Download kit.”

Download Step 3

You’ll be presented with a box titled “Learn more about DNA data files.”

Click the purple “Continue” button.

Download Step 4

You’ll need to confirm that you want to download your data, and that you understand that the download is outside of MyHeritage and their protection.

Click the purple “Continue” button. You’ll see a notice that an email has been sent.

Download Step 5

You’ll receive a confirmation e-mail. Click on “Click here to continue with download.”

This e-mail link is only valid for 24 hours.

Download Step 6

Enter your password again, and click on the purple “Download” button.

Download Step 7

Save the file as a recognizable file name on your computer.

MyHeritage DNA File Uploads TO Other Vendors

You can upload your MyHeritage file to other vendors, as follows.

From below to >>>>>>>>>>> Family Tree DNA Accepts Ancestry Accepts 23andMe Accepts GedMatch Accepts
MyHeritage Yes* No No Yes

*To upload to Family Tree DNA, you must have tested at MyHeritage after May 7, 2019.

Neither Ancestry nor 23andMe accepts uploads from any vendor.

MyHeritage DNA File Uploads FROM Other Vendors

You can upload files from other vendors to MyHeritage, as follows:

  From Family Tree DNA From Ancestry From 23andMe From LivingDNA
To MyHeritage Yes Yes Yes No

Testing and Upload Strategy

Uploading to MyHeritage is always free. You can view your ethnicity, your matches and their trees, and utilize the DNA tools, but you won’t receive the full benefit of SmartMatching, Triangulation, Theories of Family Relativity and other records without a subscription. You will be limited to building a tree of 250 people for free, but you can upload a Gedcom file of any size, although you do need to subscribe to change anything in that file if it contains more than 250 individuals.

My testing/upload recommendations are as follows relative to MyHeritage:

I wrote a step-by-step guide about how to download from Ancestry here.

I wrote a step-by-step guide about how to download your DNA raw DNA file from 23andMe, here.

Click here for step-by-step instructions for how to upload or download your FamilyTreeDNA file.

Have fun!

Please note that this article was updated in August 2021.

_____________________________________________________________

Disclosure

I receive a small contribution when you click on some of the links to vendors in my articles. This does NOT increase the price you pay but helps me to keep the lights on and this informational blog free for everyone. Please click on the links in the articles or to the vendors below if you are purchasing products or DNA testing.

Thank you so much.

DNA Purchases and Free Uploads

Genealogy Products and Services

Books

Genealogy Research

Ancestry 2018 Ethnicity Update

When ethnicity estimates were first produced by vendors, they tended to resemble the wild west.

Today, results are becoming more refined and hopefully, more accurate as reference populations grow and become more reliable.

The Ancestry ethnicity update has been in beta for several months, but this week, Ancestry rolled out the ethnicity update for everyone.

Checking Your New Results

To see your updated results, sign on and click on the DNA Story to the left with Ethnicity Estimates.

Ancestry then explains that while your DNA doesn’t change, the estimates (pay attention to that word) do as the science improves.

Ethnicity Estimate Aren’t Precise

I’ve said this before, and I want to say it again. Ethnicity is the least precise and the least accurate of DNA tools for genetic genealogy. Ethnicity estimates are the most accurate at a continental level. Within continents, like Europe, Asia and Africa, there has been a lot of population movement and intermixing over time making the term “ethnicity” almost meaningless.

I know, I know – ethnicity estimates are also the simplest because there isn’t much learning curve and they’re easy to understand at a glance. This deceptive “ease of use” also makes them interesting to people who have only a passing curiosity. That’s why they attract so many test takers who either love of hate their results, but never fully understand the true message or utilize any other genetic genealogy tools.

Let’s take a look at how ethnicity estimates have changed over time and if they have improved with the latest version.

Ethnicity Estimate Changes

In my case, my original Ancestry ethnicity estimate in 2012 was:

  • British Isles 80%
  • Scandinavia 12%
  • Uncertain 8%

To say it was really bad is an understatement.

In 2013, Ancestry introduced their ethnicity V2 version which provided a lot more granularity.

Version 2 was dramatically different, with the British Isles moving from 80% to a total of 6%. Like a pendulum swinging, neither was accurate.

Ancestry introduced new features and combined their Genetic Communities with their ethnicity estimates in 2017.

In this new 2018 version, Ancestry has divided and recombined the British Isles and Western Europe differently and the resulting differences are significant.

My mystery Scandinavian is entirely gone now, but sadly, so is my Native American.

The New Results

I just got really boring – but the question is whether or not the new results are more accurate as compared to my proven genealogy. Boring doesn’t matter. Accuracy does.

Various Ancestry Ethnicity Versions Compared to Proven Genealogy

I created a chart that reflects the three Ancestry ethnicity versions as compared to my proven genealogy.

For the current version, I also included the ranges as provided by Ancestry.

As you can see, generally, the results are much more accurate, but the regions are also fairly broad which makes accuracy easier to achieve.

Until this current version, Ancestry didn’t show any Germanic, but now the Germanic estimate is exact at 25%.  The Germanic range is also very tight at 24-26%, right where it should be.

The England, Wales & Northeast Europe category is somewhat high, but that could be accurate because I do have some ancestry that is unknown.

Unfortunately, my Native is proven, both through Y and mtDNA and by triangulating the Native segments to others descending from the same Native ancestors. That portion is now missing in my Ancestry ethnicity.

Ancestry V1 Test Versus the V2 Test

For the record, I’m using my Ancestry V1 test because I’ve used that test version for all previous ethnicity comparisons.  My Ancestry V2 test ethnicity results are approximately the same, as follows:

  • England, Wales and Northeast Europe – 76%
  • Germanic – 22%
  • Ireland and Scotland – 2%

The same tree is attached to both tests.

On my V2 test, which I seldom use, I had to answer a couple of question regarding my expectations about ethnicity testing changes and how accurate my previous results were perceived to be before I could access my updated results.

Regions Changed

In Ancestry’s FAQ, they provided this list of how the regions were and are defined.

Previous Region New Regions
Scandinavia Norway, Sweden
Iberian Peninsula Spain, Portugal, Basque
Europe South Italy, Greece and the Balkans, Sardinia
Europe East Baltic States, Eastern Europe and Russia
Caucasus Turkey and the Caucasus, Iran/Persia
Europe West Germanic Europe, France
Native American Native America—North, Central, South; Native America—Andean
Asia South Southern Asia, Western and Central India, Balochistan, Burusho
Asia East Japan, Korea and Northern China, China, Southeast Asia—Dai (Tai), Southeast Asia—Vietnam, Philippines

Ancestry has addressed lots of other questions in their FAQ as well, and I suggest taking a look. I particularly like their comment, “Some places are complicated.” Indeed, that’s true with population churn both in historical times along with unknown pre-history and that complexity is exactly what makes intra-continental ethnicity estimates so difficult. Of course, people whose ancestors are from Europe, for example, want as much granularity as possible.

Previous Ethnicity Versions

For the first time, Ancestry explains what happened between versions, at least at a high level.

Click on the little “i” in the upper right hand corner of your ethnicity estimate box.

You’ll see more information.

Click on “View Previous Estimate” at the bottom.

Your previous ethnicity estimate is shown.

To see how your estimate changed, click on “Compare these results to your most recent Ancestry DNA estimate.”

This display shows you the differences compared to the previous version. In my case, England, Wales and NE Europe increased by 69%, but that’s because Ancestry redefined the regions. Note the little slide box underneath the regions on the map. You can slide back and forth from previous to current (update.).

I do wish Ancestry had told us where the “Scandinavian” went, what category it fell into. Are those segments, as a group, included in another region? Was the previous estimate simply flat out wrong? Was Scandinavian a vestige of Vikings who invaded much of Europe? What happened?

New Regions and Reference Samples

By clicking on “See other regions tested” at the bottom of your Ethnicity Estimate box, you can view the locations of Ancestry’s current reference populations.

The regions tested in which you have results are colored, and the regions where you aren’t showing results are shades of grey. This is an improvement over the previous version which people routinely misinterpreted to mean that they had results in those tested regions.

Best Features

In my opinion, the best feature of the combined ethnicity and Genetic Communities is the combined mapping. For example, the screenshot below combines the ethnicity regions with the ancestors from my tree who immigrated from that region in that timeframe.

By clicking on the 1700 box, the people from that time period in my tree are displayed. I can enlarge the map to make the display larger, until finally individual “people” icons are displayed, as shown with Johann Peter Koehler, below. Clicking on the individual person pin shows that individual in the box at right.

By clicking on the “Lower Midwest and Virginia Settlers,” I see this region and Ancestry tells me where those settlers likely originated.

You can then scroll down to the bottom of the information box where you see “Ancestry DNA Members.”

Click on the 1000+ link and you will then see the people who match you in a specific region or migration.

It’s worth noting that this isn’t always accurate. My 2nd cousin match is showing as a “Lower Midwest and Virginia” match and our ancestors came from the Netherlands directly to Northern Indiana. Ironically, she shows up in three of the 4 regions I can select from. This feature is not 100%, but it’s still nice to be able to see where that match is grouped in terms of ethnicity and Genetic Communities, according to Ancestry.

Given this combined functionality, I do wonder if Ancestry’s new ethnicity isn’t simply population genetics, but a combination of population genetics, ancestors in my tree, my matches and corresponding DNA Circles with their associated history. If so, that would make sense, both in terms of what I’m seeing as my new ethnicity results and the map functionality as well. Could that be where my Germanic came from, and why it’s so precise at 25% which matches by tree exactly?

In Summary

For me, Ancestry’s ethnicity estimates are significantly improved with the exception that my Native disappeared. I’ve worked long and hard on the Native aspect of my genealogy, and I know that part of my ethnicity mix is valid. However, that is a very small percentage overall (about 2%), and the combined improvements certainly outshine that one negative.

Of course, your mileage may vary. What are you seeing in terms of your new ethnicity estimates as compared to your known genealogy? Better? Worse? Did you lose any categories that you know are valid? What about small amounts of minority heritage?

______________________________________________________________

Disclosure

I receive a small contribution when you click on some of the links to vendors in my articles. This does NOT increase the price you pay but helps me to keep the lights on and this informational blog free for everyone. Please click on the links in the articles or to the vendors below if you are purchasing products or DNA testing.

Thank you so much.

DNA Purchases and Free Transfers

Genealogy Services

Genealogy Research

MyHeritage Now Accepts Living DNA and 23andMe V5 Transfer Results and Partners with European Retailer

MyHeritage has been busy – making two major announcements this week.

European Retail Market Penetration

I was very encouraged a few days ago when I received an email from MyHeritage stating that they have partnered with British Retailer WHSmith to sell their tests in retail stores in Europe. The new in-store products will be called the MyHeritage Family History Discovery Kit which will bundle the DNA test with a 3 month subscription of the Complete MyHeritage plan which combines Premium Plus, Data Subscription including historical records and DNA integration.

MyHeritage has not yet released the price, but I expect it will be competitive. I’m very grateful for the MyHeritage push into Europe and look forward to new European matches. My mother carries a very high percentage of both German and Dutch and matches from those countries have been slim. Retail marketing and an in-store presence may signal the end of that problem – at least I hope so.

The great news is that MyHeritage DNA matching supports filtering DNA matches by location.

MyHeritage Accepts Illumina GSA Chip Transfers

I’ve written before about the Illumina GSA chip and compatibility issues between the that chip and existing data produced on the other Illumina chips, including the chip utilized by both MyHeritage and Family Tree DNA.  However, MyHeritage also just announced that they are accepting GSA file transfers, which means that people who have tested at the following vendors can now transfer their raw autosomal data results to MyHeritage for free.

  • 23andMe began utilizing the Illumina GSA V5 chip in August 2017, so if you have tested since that time, you haven’t been able, until now, to upload to MyHeritage.
  • LivingDNA launched with the Illumina GSA chip, so if you have ever tested at LivingDNA, you haven’t been able to upload your raw data files. Now you can!

The good news is that the upload to MyHeritage, along with the MyHeritage DNA tools are free until December 1st, and will remain free for those who upload before that date. After that, MyHeritage will begin charging a fee or subscription for advanced features such as ethnicity estimates, the chromosome browser and other features. The $$ amount will be announced closer to December.

Of course, you can also upload results from Family Tree DNA, Ancestry and earlier versions of the 23andMe test.

So, don’t wait, click here to upload now, while the upload is totally free.

______________________________________________________________

Disclosure

I receive a small contribution when you click on some of the links to vendors in my articles. This does NOT increase the price you pay but helps me to keep the lights on and this informational blog free for everyone. Please click on the links in the articles or to the vendors below if you are purchasing products or DNA testing.

Thank you so much.

DNA Purchases and Free Transfers

Genealogy Services

Genealogy Research

In the Beginning – First Steps in Genealogy

Everyone starts someplace in their genealogy. A lucky few have the opportunity to springboard from another family member who has documented the family carefully. Most of us, me included, began in the simplest of ways – asking family members.

Thank goodness I did that while there were at least a few family members left of older generations. I wish I had begun sooner, but that’s probably the most common lament of genealogists.

The next most common lament, today, would be that we wish we had DNA tested every single person in the older generations. If you haven’t, please do, immediately, while you can – and be sure they are in at least in the Family Tree DNA, Ancestry and MyHeritage databases. I also recommend uploading to GedMatch as well which will catch genealogists that test at 23andMe. Generally, only genealogists upload  to GedMatch.

I didn’t start out to be a genealogist. I was simply interested in my family. I didn’t even really grasp what a genealogist was. One day someone said to me, “Oh, so you’re a genealogist,” and I replied, “No, I’m just curious about my family.”

Famous last words.

I didn’t know there was such a thing as a pedigree chart, and my notes for the first few years were on plain paper with little organization other than a page or folder for each person. I then advanced to a green bookkeeping columnar pad to keep track of what was in the folders.

Eventually, some poor soul took pity on me and gave me a pedigree chart. I started filling in what I knew and it would be another decade before I made my first “genealogical” find in the local Family History Center. I refer to that as my first genealogical find because I wasn’t talking to a family member and had begun researching through records. My curiosity had gotten the best of me!

I remember the thrill of that obsession-defining moment well.

It was my first visit to the Center, following a brief introductory session that I had discovered in the local newspaper, and I was filled with trepidation. I didn’t want someone trying to convert me, but I was also very curious. I needn’t have worried. In all the years I visited the local FHC at the Mormon Church, no one ever tried to convert me and I visited regularly, making discovery after discovery.

The first discovery that life-changing evening, the marriage of Lazarus Estes to Elizabeth Vannoy, is what hooked me. We found it in an index, and I was terribly disappointed to discover that I had to order a microfiche and wait until it arrived from some distant location to find out WHEN Lazarus married Elizabeth. Oh, the torture!

But hooked I was, and I anxiously awaited the call from the FHC librarian telling me that my fiche had arrived. I drove to the church in record time!

I had taken my daughter with me on the first trip to the church, just in case I needed a quick “escape.” Kids are always great for “not feeling well” and she was always having stomach aches. Obviously, no escape was needed – except maybe for her.

Recently, while going through some papers, I discovered my very first pedigree chart. My first reaction was, “ahhh, how sweet,” which quickly turned to mortification when I realized how much was blank or worse, incorrect.

Let’s just bask in the “oh so sweet” for a moment.

We all start with the information we gather from family. You can see by the different ink and white-out (you do remember, white-out, right?) that I gleefully added to this pedigree as new information was discovered. Some is written in pencil, with question marks. People weren’t sure about some things, but I made notes anyway. Thankfully!

The blank spaces aren’t blank anymore, today, but that information was revealed slowly, like peeling an onion, through records research. I had talked to my mother and my great-aunt on my maternal side, and my father’s sister on my paternal side, and I gathered all that they knew. From that point forward, I had to do the research. It fell to me.

When I looked at this pedigree chart and realized how much was wrong, my initial reaction was horror – BUT – we all have to start with what we have available. If there was ever a textbook example of why verification and documentation is essential – this is it.

Much to my embarrassment, the red arrows point to information that was wrong. I’ve sized the arrows relative to the magnitude of the inaccuracy.

For example, the biggest error is that Rebecca Rosenberg or Rosenbaum was NOT the mother of Margaret Clarkson/Claxton. For the record, Elizabeth Speaks was, but she was related to the Rosenbaums through her father’s sister’s marriage. My aunt had her in the right neighborhood and family, but attributed the wrong person as her mother.

Of course, if I hadn’t figured it out through records, eventually DNA might have revealed the problem. BUT, since the Rosenbaum descendants were related to the Speaks family, autosomal DNA might not have divulged the problem since the Rosenbaums would have matched some Speaks too. However, mitochondrial DNA would have immediately showed a discrepancy because their matrilineal ancestors weren’t the same. Don’t forget to utilize all tools available.

Oh, and based on the Rosenbaum/Rosenburg surname, my aunt informed me that we were Jewish. Also that the Bolton’s were German, and that my great-grandmother Elizabeth Vannoy was Cherokee, all of which were subsequently proven to be incorrect by using historical records plus DNA, but I digress. Point being that I believed my aunt at the time, because surely she knew – and she obviously knew more than I did which was absolutely nothing.

Notice that several of the dates have smaller arrows. Those are off by one or two years, so again, the right ballpark but the wrong information. At least the information for my parents was accurate! (humor)

It’s also interesting that on my mother’s side, much more was known about the female side of the family. But then again, my great-aunt who I was able to interview was my maternal grandmother’s sister.

My Aunt Margaret on my father’s side didn’t grow up in Tennessee and most of what she knew was second hand. For example, she told me that her Bolton grandparents, Joseph and Margot (Margaret) had both died a day or so apart in the 1918 flu epidemic. He died first and the family put him in the barn waiting for her to die the next day so they could bury them in the same coffin. I didn’t know if that was romantic or simply expeditious for the survivors, under the circumstances, especially if many were ill and coffin-makers and grave-diggers were in short supply.

Well, Aunt Margaret was close. Joseph died on February 23, 1920, not during the 1918 flu epidemic. Still, they did both die of pneumonia following the flu, according to their death certificates, which certainly weren’t available to me in the 1970s or 1980s. Joseph’s wife died on March 11, 1920. Of course, there’s no way to know if they were buried at the same funeral, or in the same coffin. Their deaths were separated by more than two weeks.

I’m certainly glad I recorded every tidbit that I did. I’ve returned to my original notes years later and found extremely valuable hints that I had originally forgotten about or didn’t understand the value of the hint initially.

How could I forget something important? It wasn’t important then or we’re human and we do forget.

Every piece of family information needs to be viewed as a hint, not as gospel. As well-meaning as our family members are, and lovely for sharing, they can only provide us with the information they know or have been provided by others. Who’s to say if it has been conveyed or remembered accurately? The most reliable information is first person, but even that is subject to lapses of memory or the softening of time.

Don’t believe it? Just remember how often you forget what you went into the other room for😊

Documenting every piece of information is up to us and seldom does that documentation process and subsequent review not provide some new tidbit or surprise.

How accurate was your original pedigree chart?

______________________________________________________________

Disclosure

I receive a small contribution when you click on some of the links to vendors in my articles. This does NOT increase the price you pay but helps me to keep the lights on and this informational blog free for everyone. Please click on the links in the articles or to the vendors below if you are purchasing products or DNA testing.

Thank you so much.

DNA Purchases and Free Transfers

Genealogy Services

Genealogy Research

Family Tree DNA Step by Step Guide: How to Upload-Download DNA Files

In this Upload-Download Series, we’ll cover each major vendor:

  • How to download raw data files from the vendor
  • How to upload raw data files to the vendor
  • Other mainstream vendors where you can upload this vendor’s files

You can both upload autosomal data files from another vendor to FamilyTreeDNA, and download from FamilyTreeDNA. Please note that downloading a copy of your raw data file from any vendor does not interfere with your matches at that vendor.

Uploading DNA Files TO Family Tree DNA

Please note that the name of FamilyTreeDNA‘s autosomal test is the Family Finder test. FamilyTreeDNA also offers Y DNA (male paternal line only) and mitochondrial DNA (matrilineal line only for both sexes) tests, so the Family Finder name differentiates the autosomal test from those other types of genealogical tests.

If you have already taken the Family Finder test at FamilyTreeDNA‘or already uploaded an autosomal DNA file from another vendor, there’s no need to upload a second file.

However, if you haven’t yet uploaded an autosomal file, now’s the time!

Upload Step 1

On the main Family Tree DNA page, click on “Upload DNA Data,” at the top.

Upload Step 2

Click on  “Autosomal DNA.”

Upload Step 3

Complete the form.

If you already have tested Y or mitochondrial DNA at Family Tree DNA, click on “Already have a Family Tree DNA account,” beneath the grey bar so that your uploaded test can be integrated with your existing account which will allow you to use the advanced matching tools.

Sign on to your account, then in the upper right-hand corner of your page, click on “Add Ons and Upgrades” and scroll down to select DNA Transfer Options.

Then click “Transfer Now.”

If you have already taken the Family Finder test at FamilyTreeDNA, there’s no need to upload your autosomal DNA from any other vendor, so you’re all set.

To continue the upload process, you’ll need to tell FamilyTreeDNA which vendor’s file you’re uploading.

Upload Step 4

Select the vendor test that you are going to upload. Uploads accepted include:

  • 23andMe V3, V4 and V5  – tests taken after December 2010
  • Ancestry V1 and V2 – V2 is the current test as of August 2021
  • MyHeritage – must have tested after May 7, 2019. Family Tree DNA is the lab that does MyHeritage testing so their transfer/upload process is a little different.

If you select “MyHeritage,” you will be redirected to MyHeritage to log in and select your kit for transfer/upload.

If you select either 23andMe or Ancestry DNA, you will be directed to either drag and drop your data file from that vendor or browse to upload.

Family Tree DNA provides a step-by-step guide, including a video, for accessing your raw data files from those vendors by clicking here.

You will be assigned a Family Tree DNA kit number. After your results are processed, you can sign in to see your matches.

Upload Step 5

The upload to Family Tree DNA is free and so is viewing your matches along with basic tools. However, for additional tools, such as ethnicity and the chromosome browser, you’ll need to purchase the $19 unlock. This is a great value, as compared to retesting at the regular price.

You will be prompted for the “Unlock” purchase if you click on either the Chromosome Browser button, the Ethnicity button or other advanced tools on your dashboard after your results are finished.

Downloading Your DNA File FROM Family Tree DNA

Download – Step 1

To download your raw autosomal DNA file from Family Tree DNA, click on the “See More” link in the Family Finder section on your dashboard. Then, click on “Data Download.”

Alternatively, you can select the “Download Raw Data” option at the top of the page under Results and Tools, then Autosomal DNA.

Download Step 2

Click the arrow to download.

Download Step 3

Save the file in a manner that you’ll recognize. The file name will be something like “37_R_Estes_Chrom_Autoso_20180818.gz”. I append the word FTDNA in front of the 37 so there is no question which vendor’s file this is. The last several digits are the date.

FamilyTreeDNA File Uploads TO Other Vendors

You can upload Family Tree DNA results to other vendors, as follows:

From below to >>>>>>>>>>> Ancestry Accepts MyHeritage Accepts 23andMe Accepts GedMatch Accepts
Family Tree DNA No Yes No Yes

Neither Ancestry nor 23andMe accept uploads from any vendor.

FamilyTreeDNA Uploads FROM Other Vendors

You can upload files from other vendors to Family Tree DNA, as follows:

From Ancestry  From MyHeritage  From 23andMe  From Living DNA
Family Tree DNA Accepts Yes Yes* V3, V4, V5 No

*To upload MyHeritage files to Family Tree DNA, you must have tested at MyHeritage after May 7, 2019.

Testing and Upload Strategy

Uploading to Family Tree DNA is always free, and you can view:

  • Your matches
  • People you match in-common-with your matches – in other words shared matches
  • Maternally or paternally assigned (bucketed) matches based on known, tree-linked relatives

In order to view your ethnicity and use advanced tools like the chromosome browser, you’ll need to purchase the $19 unlock.

Remember that while Ancestry and MyHeritage both have records subscriptions to sell you, Family Tree DNA doesn’t. For Tier 1 tools, GedMatch requires a subscription. At Family Tree DNA, you pay a one-time fee to unlock all of their advanced tools. Every company needs to be profitable to stay in business and develop new tools, and each company has a different product pricing model.

My testing/upload recommendations are as follows relative to Family Tree DNA:

I wrote a step-by-step guide about how to download from Ancestry here.

    • If you test at MyHeritage, upload your DNA file to Family Tree DNA for free. You need to have tested at MyHeritage after May 7, 2019.

I wrote a step-by-step guide about how to download your DNA file from and to MyHeritage, here.

I wrote a step-by-step guide about how to download your DNA raw DNA file from 23andMe, here.

Have fun!

Please note that this article was updated in November 2024.

_____________________________________________________________

Disclosure

I receive a small contribution when you click on some of the links to vendors in my articles. This does NOT increase the price you pay but helps me to keep the lights on and this informational blog free for everyone. Please click on the links in the articles or to the vendors below if you are purchasing products or DNA testing.

Thank you so much.

DNA Purchases and Free Transfers

Genealogy Products and Services

Books

Genealogy Research

Proving or Disproving a Half Sibling Relationship Using DNAPainter

I had this nagging match at MyHeritage for some time who had not responded to messages and who didn’t have a tree. When she did reply, she explained that she was adopted, but I had already been working on how she was related.

Initially, I didn’t think too much of the match, especially when she didn’t reply, but after SmartMatching and Triangulation appeared on the scene, this match haunted me just about daily. Who the heck was Dee? We share enough DNA that we might even share a family resemblance.

Recently, when I became focused on my Dad’s life and (ahem) bad-boy mis-adventures once again, I realized that while this clearly isn’t a half-sibling match, my half-sibling would likely be long-deceased. I was born late in my father’s life and he was breaking hearts 40 years earlier – which means he could also have been fathering children. Dee could be my half-sibling’s child or grandchild.

Let’s take a look at this situation and how I used DNAPainter to quickly narrow the possibilities, even with no additional information.

The Problem

Here’s my match to Dee (not her name) at MyHeritage.

Dee matches me at 521 cM on 17 segments.

Taking a quick look at the DNAPainter Shared cM Tool, you can see that Dee falls into the non-dimmed relationship ranges below, with dark grey being the most probable.

The most likely relationships are shown in the table below.

Dee is in her 50s, so she’s clearly not my great aunt or uncle or grandparent.

The Possibilities

Based on who she matches, I know the match is from my father’s side. I have no full siblings and my mother’s DNA is at MyHeritage.

My father could have been begetting children beginning about 1917 or so and could have continued through his death in 1963.

My half sister’s daughter has also tested at MyHeritage, and Dee matches her more distantly than me, so Dee is not an unknown descendant of my half-sister.

Dee could have been a child or grandchild of a half sibling that I’m unaware of – which of course is my burning question.

I checked the in-common-with matches and while they made sense, I needed something much faster than working with multiple trees and matches and attempting to build them out.

Besides, I desperately wanted a quick answer.

DNAPainter to the Rescue

I’ve written three previous articles about utilizing DNAPainter.

I continue to paint matches where I can identify known ancestors. Currently, I’m up to 689 segments identified and painted which is about 62% of my genome.

Surely this investment should pay off now, if I can only figure out how.

I’ve painted hundreds of segments on both my paternal grandmother and grandfather’s sides. If Dee is a half sibling (descendant) to me, she will match both my paternal grandmother’s line and my paternal grandfather’s line. If Dee is related on one of those lines, but not the other, then Dee will match one grandparent’s line, but not the other grandparent’s line.

Dee can’t be descended from a half sibling if she doesn’t match both of my paternal grandparents, meaning William George Estes and Ollie Bolton’s lines.

Painting

The first thing I did was to paint the segments where Dee and I match, assigning a unique color.

After painting, I compared each chromosome individually, looking at the other ancestors painted that overlapped with the bright yellow.

The next step was to look at each chromosome and see which ancestor’s DNA overlaps with Dee’s.

Without fail, every single one of these segments matched with my paternal grandfather’s side, and none matched with my paternal grandmother’s side.

To confirm, I have a cousin, we’ll call him Buzz, whose ancestor was my grandmother’s brother, so Buzz is my second cousin. If Dee is my half sibling’s child or grandchild, Buzz, who also tested at MyHeritage, would be Dee’s second cousin or second cousin once removed. No second cousins have ever been proven NOT to match, so it’s extremely unlikely that Dee is descended through Ollie Bolton.

Is there a very small possibility? Yes, if Dee is actually a second cousin twice removed from Buzz, which is genetically the equivalent of a third cousin. Third cousins only match about 90% of the time.

However, Dee also doesn’t match anyone else on my grandmother’s side, so it’s very unlikely that Dee descends from Ollie Bolton’s parents, Joseph “Dode” Bolton and Margaret Clarkson/Claxton.

Therefore, we’ve just “proven,” as best we can, that Dee does NOT descend from a previously unknown half-sibling.

We’ll just pause for a minute here – I was so hopeful☹

Regroup – Other Possible Relationships

OK, redraw the chart without Ollie. Dee is still very closely related, so what are the other possibilities?

Dee does match people with ancestors from both the lines of Lazarus Estes and Elizabeth Vannoy, so Dee is either an unknown descendant of William George Estes or his parents, given how closely she matches me and other descendants of this family.

Or… as luck would have it, Dee could also be descended from the sister of Lazarus Estes (Elizabeth Estes) who married the bother of Elizabeth Vannoy (William George Vannoy.) Yes, siblings married siblings. Two children of Joel Vannoy and Phoebe Crumley married two children of John Y. Estes and Rutha (or Ruthy) Dodson.

You know, these mysteries can never be simple, can they?

In the chart above, gold represents the people who descend from a combination of a pink and blue couple. Joel Vannoy and Phoebe Crumley are shown twice because there was no easy way to display this couple.

One way or another Dee and I are related through these two couples. Of course, I’m curious as to how, and excited to help Dee learn about her family, but this isn’t going to be an easy solve, because of the potential double descent. Under normal circumstances, meaning NOT doubly related, Dee is most likely my half-great niece, meaning that her unknown grandparent is either a child of William George Estes (my grandfather) or descended from his parents, Lazarus Estes and Elizabeth Vannoy.

However, the doubling of DNA in the William George Vannoy/Elizabeth Estes line would make Dee look a generation closer if she descends from that line, so the genetic equivalent of descending from Lazarus Estes and Elizabeth Vannoy. The only way to solve for this equation would be to see how closely she matches a descendant of Elizabeth Estes and William George Vannoy – and no one from that line is known to have tested today.

For now, my driving question of whether I had discovered an unknown half-sibling has (most probably) been answered between the segment information at MyHeritage combined with the functionality of DNAPainter.

Family Tree DNA Group Project Privacy Levels

Recently, Family Tree DNA sent two emails about the new Group Project privacy settings and policies that are now in effect. The first email was to project members, and the second was to administrators.

I’m combining information from both in this article, along with step-by-step instructions for what you need to do, whether you’re a project member or a project administrator.

Before GDPR came into force in May 2018, group project administrators had more latitude to help project members by viewing all fields and being able to change some that weren’t deemed critical to privacy. For example, administrators could add the member’s most distant ancestor, help them with a tree or enter the mapped location of their direct maternal or paternal ancestor. Administrators could not change personal things like name, e-mail, contact information or passwords.

With the arrival of GDPR, Family Tree DNA implemented changes in order to achieve compliance which had the unfortunate effect of restricting administrators’ ability drastically. With the pressure of the GDPR deadline past, Family Tree DNA has rethought some of the restrictions and made welcome modifications.

Who is Affected and What Changed?

Anyone who has tested at Family Tree DNA and is a member of any project is affected, even if you may not realize that you are.

Before we go any further, let’s discuss the privacy settings which fall into basically three categories:

  • very low
  • medium (normal)
  • high

In the chart below, we see the names assigned to the levels as of the GDPR rollout, and now. The names have changed.

The May 2018 names were problematic because some project members became confused, thinking that Project Only was giving full access for this project. Additionally, Full access wasn’t full, but did allow some modifications. Therefore, in an effort to minimize confusion, Family Tree DNA has now renamed the access levels. The () are my descriptions.

The GDPR Transition

In May, the pre-GDPR privacy settings for project members were programmatically converted to the new settings, the result being that many project members were converted over with new settings that were much more restrictive than they were previously. I am still hopeful that this issue will be addressed, because the expectation of individuals who joined projects in the 19 years before GDPR was that the administrators had access to work with their results – and always would have. Many of those individuals have been project members for years and have now passed away, eliminating any possibility of the project administrator obtaining even limited (partial view only) access from the member.

For example, with Minimal access, administrators can’t see either members results or trees. With Limited Access, project administrators can’t see the member’s personal profile or privacy selections, but at least can view their tree and results.

Furthermore, anyone who joined a project after May 25th was joined at the minimal level, requiring the new member to change their settings to Limited, providing the administrators a reasonable level of access. Most people didn’t realize that, and therefore the majority of people who have recently joined projects remain at the minimal level.

New Joins No Longer Default to Minimal

When joining a project, new members are currently given the option of assigning an administrator a level – meaning the minimum privacy level is no longer assigned as a default. This is a HUGE improvement.

Due to the transition as well as the “join” policy between May and August leaving many people with Miminum settings, project administrators may want to contact individuals who currently have the Minimum level and ask them to change their settings.

Moving Forward

What matters currently is that you, or kits you manage, may now be at the MOST restrictive level which was originally called “Project Only” after conversion, but has now been renamed as “Minimal Required.”

From my perspective, if a group member does not want the administrators working with their results, they shouldn’t join the project. The purpose and focus of projects is collaboration.

New Settings and Permissions

The chart below, now shown to people when they join projects, summarizes the various abilities that administrators have under Minimal, Limited and Advanced.

With the most restrictive “Minimal Required” setting, administrators cannot see critical items such as a member’s tree or who they match. Minimal Required is extremely restrictive, which means that administrators can’t group the individual within the project appropriately.

With the original GDPR privacy rollout, many people were automatically converted to what is now “Minimal Required” and are unaware that their privacy selection has been downgraded.

Access Now Granted To Individual Administrators

Another change is that members now grant each individual project administrator a specific and different level of access unique to that administrator.

This change is quite beneficial, because you may want to grant one project administrator Advanced access which allows them to change some fields, while granting the rest Limited.

New Administrators

In this latest update, you can now grant all future project administrators an access level too, creating a legacy for future project administrators to have access to your results at the level you select.

After GDPR, new project administrators were only granted “minimal” access to every project member, meaning that in essence, new administrators were entirely hamstrung if every project member didn’t individually change their access for that administrator.

Needless to say, project members who joined projects before GDPR did not expect this would ever happen. Many have died or become disinterested and that meant that their results would forever be unavailable to new administrators.

Granting at least minimal access to future administrators assures that your DNA within a project will never be dead.

Another change last week was that new administrators are now granted Limited access, unless you specifically select either Minimal or Advanced access for new administrators.

Advanced Versus True Full Access

Advanced access is not the same as full access.

If you want an individual, project administrator or otherwise, to truly have full access to your account, you need to personally give them your kit number and password, realizing that allows them to function entirely “as you.” I have done this, because when I die, I want my DNA legacy to live vibrantly into the future.

Beneficiary

Speaking of legacy, please take this opportunity to complete your beneficiary form so that Family Tree DNA knows who to allow access to your account after your death.

Access Levels

Bottom line – you need to check BOTH your “Privacy and Sharing” setting along with “Project Preferences” for each project that you belong to because your settings may be much more restrictive than you think they are.

Privacy and Sharing

The Privacy and Sharing tab allows your results to be shown in the public project.

You MUST OPT IN to project sharing, or your results won’t be included in the public project display.

Most people don’t realize that the default is to NOT SHOW in a project, believing that if they join a project, their results will automatically be anonymously displayed in the public portion of the project. You must opt-in, so be sure that little box at the right side of the Group Project Profile is checked.

Project Preferences

The Project Preferences tab is where you grant project administrator rights.

Let’s look at the various group project preference privacy levels; Minimal, Limited and Advanced, and what they provide.

Level: Minimal Required

From the Family Tree DNA Learning Center:

Minimal Required is the most limited access level. This access level permits the Group Administrator or co-administrator to access project administration tools that allow him or her to view certain results in relation to how you match other project members; however, this access level does not allow the administrator to visit your myFTDNA pages.

The following table lists the Group Administration Pages and the corresponding group member information viewable by administrators assigned the Minimal Required level:

Minimal Required
Group Administration Report Page* Viewable Information
Profile Information
(viewable by Group Administrators, co-administrators, and other project members in multiple locations)
  • Name
  • Email
Maternal and Paternal Ancestry
  • Maternal and Paternal
    Country of Origin
    (from release form only)
  • Most distant ancestor and location
  • Family tree (if public)
Order Summary
  • Y-STR
  • Big Y-500
  • mtDNA
  • Deep Clade
  • Family Finder
  • Geno 2.0
Pending and Received Lab Results
  • Pending lab results
  • Completed lab results
Received and Unreceived Kits
  • Kit status
FF Illumina OmniExpress Matrix
  • Matrix of in-project members and who they match
FF Illumina OmniExpress Results
  • Comparison and download of in-project matches and their chromosome information
mtDNA Results Classic
  • Haplogroup
  • HVR1/2 mutations
  • Coding region mutations
    (only if authorized)
Y-DNA Genetic Distance
  • Subgroup
Y-DNA TiP Report
  • Genetic distance to other project members
Y-DNA Results
  • Haplogroup
  • STR marker values
Y-DNA Results Classic
  • Haplogroup
  • STR marker values
Y-DNA Results Colorized
  • Haplogroup
  • STR marker values
Y-DNA SNP
  • SNPs
Member Subgrouping
  • SNPs
Activity Feed
  • Postings

*These pages are only accessible by Group Administrators and co-administrators unless otherwise noted.

Level: Limited and Advanced

Limited is the recommended access level. This level of access permits the Group Administrator or co-administrator to visit and view certain information on your myFTDNA pages in order to assist with kit management and to better facilitate project research. Additionally, this access level includes all of the permissions granted with the Minimal Required level.

For more information on the permissions granted with this level, see the below Limited and Advanced Access table.

Advanced access permits the Group Administrator or co-administrator to visit, view, and modify certain information on your myFTDNA pages in order to assist with kit management and better facilitate project research. Additionally, this access level includes all of the permissions granted with the Limited access level.

The Advanced access level is designed to allow an individual administrator to fully manage a project member’s kit and function on their behalf. This includes ordering products and modifying information with the exceptions of the primary email address and project preferences for other Group Projects.

The following table lists your myFTDNA pages and the corresponding limitations and permissions granted to the administrator with the Limited and Advanced access levels.

Note: In addition to the personal information mentioned below, administrators for Group Projects of which you are a member and whom you have assigned Limited or Advanced access and administrators to whom your matches have granted Limited or Advanced access, will be able to view your profile, match information (e.g., Common Matches, Genetic Distances, and Shared Segments) and some Genetic Information (e.g., genetic markers and ethnicity information).

Limited and Advanced
Group Member myFTDNA Page Limited (Recommended)
(read only)
Advanced
(modify capability)
myFamilyTree Yes Yes
Complete Order History Yes Yes
Personal Surveys No Yes
Products and Upgrades
(Ability to purchase tests or upgrades
for group member)
No Yes
Family Finder
Family Finder Raw Data Download No Yes
Family Finder Matches Yes Yes
Download Family Finder Matches Yes Yes
Family Finder Linked Relationship Yes Yes
Family Finder Chromosome Browser Yes Yes
Download Family Finder Chromosome Browser Yes Yes
Family Finder myOrigins Yes Yes
Family Finder Shared Origins Yes Yes
Family Finder ancientOrigins Yes Yes
Family Finder Matrix Yes Yes
Population Finder Survey No Yes
Family Finder Advanced Matches Yes Yes
mtDNA
mtDNA Download Matches Yes Yes
mtDNA View Matches Yes Yes
mtDNA Ancestral Origins Yes Yes
mtDNA Matches Maps Yes Yes
mtDNA Migration Maps Yes Yes
mtDNA Haplogroup Origins Yes Yes
mtDNA Print Certificates No Yes
mtDNA Download FASTA No Yes
mtDNA View Results Yes Yes
mtDNA Advanced Matches Yes Yes
Y-DNA and Big Y-500
Y-DNA Download Matches Yes Yes
Y-DNA View Matches Yes Yes
Y-DNA Ancestral Origins Yes Yes
Y-DNA Haplotree & SNPs Yes Yes
Y-DNA SNPs Download Yes Yes
Y-DNA Matches Maps Yes Yes
Y-DNA Migration Maps Yes Yes
Y-DNA SNP Map Yes Yes
Y-DNA Haplogroup Origins Yes Yes
Y-DNA Print Certificates No Yes
Y-DNA Download Y-STR Results Yes Yes
Y-DNA View Y-STR Results Yes Yes
Y-DNA Advanced Yes Yes
Big Y-500 Results Yes Yes
Big Y-500 Matches Yes Yes
Big Y-500 BAM File Download No Yes
Big Y-500 Download VCF No Yes
Y-DNA Advanced Matches Yes Yes
Other Results
All Factoids Results No Yes
X-STR Yes Yes
Individual Y-STR Yes Yes
Individual Autosomal Markers Yes Yes
Applications
Partner Applications No Yes
Vitagene Wellness No No
Account Settings
Contact Information No Yes (except primary email)
Change Password No Yes (must know the current password to change it)
Beneficiary Information No Yes
Earliest Known Ancestors Yes Yes
Surnames Yes Yes
Privacy & Sharing Yes Yes
Project Preferences Yes Yes*
Notification Preferences Yes Yes
Projects
Join a Project Yes Yes

* An administrator granted Advanced access has the ability to modify permissions for administrators in other projects who have Limited or Minimal Required access; however, they cannot grant Advanced access to or remove Advanced access from any other administrator or co-administrator. Additionally, administrators granted Advanced access by a member can, on the member’s behalf, leave other projects with the exception of those having administrators who also have Advanced access.

Checking Your Settings – Step by Step Instructions

Step 1

Sign on to your account at Family Tree DNA and select the orange “Manage Personal Information,” right under your Profile photo, or the location reserved for the photo.

Then click on the Project Preferences tab:

Click on the Edit function which shows you the current level for each administrator in a specific project, allowing you to select a new level, and then allowing you to pre-select a new level for all new future administrators of this project.

I strongly recommend that you pre-select (at least) the Limited Access level.

Then, click on Accept which shows you a summary of your new selections.

Click “Confirm” and you’re all set.

You’ll need to repeat this step to check administrator rights for all projects that you have joined.

Step 2

Next, click on the privacy and sharing tab to opt in to Project Sharing. You only have to do this one time, but if you don’t – your results will NOT BE INCLUDED in any public projects.

Why is that important?

Public project displays encourage people to participate in DNA testing and join projects, especially Y and mitochondrial. If they see several lines tested, they are much more likely to purchase a test to see if they match a line they think might be theirs. Projects serve as advertising which helps all genealogists.

So please, opt in!

Project Administrators

If you’re a Family Tree DNA project administrator, you’ll need to do the following:

  • Review your Member Information List for members who have the minimal setting AND those who are not publicly sharing their DNA results.

In my Estes project of 327 individuals, 32 converted with Minimal access, including my immediate family members whose kits I manage. I don’t know if this 10% number holds true across all projects, but that’s a nontrivial number of people whose results you can’t access, and who you can’t help.

You’ll need to do the following:

  • Educate your members about why you need either Limited or Full Access as well as why they want to consider allowing their results to be publicly displayed.
  • If as an administrator, you’ve elected to prevent your project from publicly displaying, please consider making your project public. Family Tree DNA does not display the results of any individual in a project who does not opt-in to having their results shown publicly – so you don’t have to worry about that.
  • Using the administrator’s Bulk Email function, send a project e-mail with instructions for how to check and select new Project Preference administrator settings as well as where to find the Project Sharing opt-in. (Feel free to link to this article.)
  • Follow-up by sending individual e-mails to members who don’t change their settings.
  • If you have a number of people in your project who are not grouped, you can group people with “Minimal” access into one group, and send a group e-mail to only them. I think that would be easier than e-mailing everyone individually, but as a project administrator, I’m committed to doing whatever needs to be done to preserve the integrity of my projects.

Getting Help

  • If you run into problems and need help, you can call Family Tree DNA at 713-868-1438 M-F 9-5 CST and select the customer support option or initiate a support request by clicking on help at the very bottom of every page.
  • If you’re a project administrator and run into problems, don’t forget that Family Tree DNA has a Group Support Department to help administrators. You can call the same number and select the option for groups or e-mail groups@ftdna.com.

______________________________________________________________

Disclosure

I receive a small contribution when you click on some of the links to vendors in my articles. This does NOT increase the price you pay but helps me to keep the lights on and this informational blog free for everyone. Please click on the links in the articles or to the vendors below if you are purchasing products or DNA testing.

Thank you so much.

DNA Purchases and Free Transfers

Genealogy Services

Genealogy Research

Ancestors: What Constitutes Proof?

All genealogists should be asking this question for every single relationship between people in their trees – or at least for every person that they claim as an ancestor. The answer differs a bit when you introduce DNA into the equation, so let’s discuss this topic.

It’s easier to begin by telling you what proof IS NOT, rather than what proof is.

What is Proof, Anyway?

First of all, what exactly do we mean by proof? Proof means proof of a relationship, which has to be proven before you can prove a specific ancestor is yours. It’s a two-step process.

If you’re asking whether those two things are one and the same, the answer is no, they are not. Let me give you a quick example.

You can have proof that you descend from the family of a specific couple, but you may not know which child of that couple you descend from. In one case, my ancestor is listed as an heir, being a grandchild, but the suit doesn’t say which of the man’s children is the parent of my ancestor. So frustrating!

Conversely, you may know that you descend from a specific ancestor, but not which of his multiple wives you descend from.

You may know that your ancestor descends from one of multiple sons of a particular man, but not know which son.

Therefore, proof of a relationship is not necessarily proof that a particular person is your ancestor.

Not Proof of an Ancestor

OK, so what’s NOT proof? Here are a dozen of the most common items – and there are surely more!

  1. Proof is not a DNA match alone. You can match as a result of ancestors on any number of lines, known or unknown.
  2. Proof is not an oral history, no matter how much you want to believe it or who said it. Oral history is a good starting point, not an end point.
  3. Proof is not, not, 1000 times NOT someone else’s tree. A tree should be considered a hint, nothing more.
  4. Proof is not a book without corresponding evidence that can be independently corroborated. Being in print does not make it so, people make mistakes and new information surfaces.
  5. Proof is not a man by the name of Jr., meaning that he is the son of a man by the same name with the suffix of Sr. Sr. often means older and Jr. means younger, but not necessarily related. Yes, this has bitten me.
  6. Proof of a father/son relationship is not two men with the same name in the same location.
  7. Proof is not a Y DNA match, at least not without additional information or evidence, although it’s a great hint!
  8. Proof is not an autosomal DNA match, unless it is an extremely close match and even then you (probably) need additional information. For example, if you have a half-sibling match, you need additional information to determine which parent’s side.
  9. Proof is not an Ancestry Circle, at least not without additional information.
  10. Proof is not similar or even identical ethnicity, or lack thereof.
  11. Proof is not a “DNA Proven” icon, anyplace.
  12. Proof is not a will or other document, at least not alone, and not without evidence that a person by the same name as the child is the RIGHT person.

I learned many of these NOTS or KNOTS as I prefer to call them, because that’s what they tie me in, by ugly experience. I began genealogy before there were proof standards, let alone the GPS (Genealogical Proof Standard). DNA adds yet another dimension to existing paper standards and is an important aspect of the requirement for a “reasonably exhaustive search.” In fact, there is no reason NOT to include DNA and I would suggest that any genealogical search is not complete without including genetic evidence.

Proof Is a Two-Way Street

Using traditional genealogy, genealogists must be able to prove not only that an ancestor had a child by a specific name, but that the person you believe is the child, is indeed the child of that ancestor.

Let me use an example of Daniel, the son of one Philip Jacob Miller in Washington County, Maryland in 1783.

The tax list shows Philip J. Miller, 15 entries from the bottom of the page, shown below. It also shows “Daniel Miller of Philip” 6 entries from the bottom, and it’s our lucky day because the tax list says that Daniel is Philip’s son.

But wait, there’s another Daniel, the bottom entry. If you were to look on the next page, you would also notice that there’s a Philip Miller who does not own any land.

What we have here is:

  • Philip J. Miller, with land
  • Daniel, son of Philip, no land
  • Daniel, no father listed, land
  • Philip, no land

This just got complex. We need to know which Philip is Daniel’s father and which Daniel is which Philip’s son.

Establishing proof requires more than this one resource.

The great news about this tax list is that it tells us how much land Philip J. Miller owned, and utilizing other resources such as deeds and surveys, we can establish which Philip J. Miller owned this land, and that his name was indeed Philip Jacob Miller. This is important because not only is there another Philip, who, by the way, is NOT the son of Philip Jacob Miller (knot #6 above), there is also another Jacob Miller, who is NOT Philip Jacob Miller and who isn’t even related to him on the Miller line, according to the Y DNA of both men’s descendants.

How would we prove that Philip Jacob Miller is the father of Daniel Miller? We’d have to follow both men backward and forward in time, together. We have great clues – land ownership or lack thereof.

In this case, Philip Jacob Miller eventually sells his land. Philip Jacob Miller also has a Bible, which is how we know that there is no son named Philip. Philip Jacob’s son, Daniel leaves with his brother David, also on this tax list, travels to another location before the family is reunited after moving to Kentucky years later, where Philip Jacob Miller dies with a will. All of his heirs sign property deeds during probate, including heirs back in Frederick and Washington County, Maryland. There is enough evidence from multiple sources to tie these various family members from multiple locations conclusively together, providing two way proof.

We must be able to prove that not only did Philip Jacob Miller have a son Daniel, but that a specific Daniel is the son of that particular Philip Jacob Miller. Then, we must repeat that exact step every generation to the present to prove that Philip Jacob Miller is our ancestor.

In other words, we have a chain of progressive evidence that taken together provides conclusive proof that these two men are BELIEVED to be related. What? Believed? Don’t we have proof now?

I say believed, because we still have issues like unknown parentage, by whatever term you wish to call it, NPE (nonpaternal event, nonparental event,) or MP (misattributed parentage,) MPE (misattributed paternal or parental event) or either traditional or undocumented adoptions. Some NPEs weren’t unknown at the time and are results of situations like a child taking a step-parent’s surname – but generations later – having been forgotten or undocumented for descendants, the result is the same. They aren’t related biologically in the way we think they are.

The Big Maybe

At this point, we believe we have the Philips, Philip Jacobs and Daniels sorted correctly relative to my specific line. We know, according to documentation, that Daniel is the son of Philip Jacob, but what if MY ancestor Daniel ISN’T the son of Philip Jacob Miller?

  • What if MY ancestor Daniel just happens to have the name Daniel Miller and lives in the same geography as Philip Jacob Miller, or his actual son Daniel, and I’ve gotten them confused?
  • What if MY ancestor Daniel Miller isn’t actually my ancestor after all, for any number of reasons that happened between when he lived and died (1755-1822) and my birth.

If you think I’m being facetious about this, I’m not. Not long after I wrote the article about my ancestor Daniel Miller, we discovered another Daniel Miller, living in the same location, also descended from the same family as evidenced by BOTH Y and autosomal DNA. In fact, there were 12 Daniel Millers I had to sort through in addition to the second Daniel on the 1783 tax list. Yes, apparently Daniel was a very popular name in the Miller family and yes, there were several male sons of immigrant Johann Michael Muller/Miller who procreated quite successfully.

Enter DNA

If DNA evidence wasn’t already a factor in this equation, it now must come into play.

In order to prove that Philip Jacob Miller is my ancestor, I must prove that I’m actually related to him. Of course, the methodology to do that can be approached in multiple ways – and sometimes MUST be approached using different tools.

Let’s use an example that actually occurred in another line. Two males, Thomas and Marcus Younger, were found together in Halifax County, Virginia, right after the Revolutionary War. They both had moved from Essex County, and they consistently were involved in each other’s lives as long as they both lived. They lived just a couple miles apart, witnessed documents for each other, and until DNA testing it was believed that Marcus was the younger brother of Thomas.

We know that Marcus was not Thomas’s son, because he was not in Thomas’s will, but Marcus and his son John both witnessed Thomas’s will. In that time and place, a family member did not witness a will unless it was a will hastily constructed as a person was dying. Thomas wrote his will 2 years before it was probated.

However, with the advent of DNA testing, we learned that the two men’s descendants did not carry the same Y DNA – not even the same haplogroup – so they do not share a common paternal ancestor.

Needless to say, this really threw a monkey wrench into our neat and tidy family story.

Later, the will of Thomas’s father, Alexander, was discovered, in which Marcus was not listed (not to mention that Alexander died before Marcus was born,) and, Thomas became the guardian of his three sisters.

Eventually, via autosomal DNA, we proved that indeed, Marcus’s descendants are related to Thomas’s descendants as well as other descendants of Thomas’s parents. We have a proven relationship, but not a specifically proven ancestor. In other words, we know that Marcus is related to both Thomas and Alexander, we just don’t know exactly how.

Unfortunately, Marcus only had one son, so we can’t confirm Marcus’s Y DNA through a second line. We also have some wives missing from the equation, so there is a possibility that either Marcus’s wife, or his unknown biological father’s family was otherwise related to Alexander’s line.

So, here’s the bottom line – we believe, based on various pieces of compelling but not conclusive evidence that Marcus is the illegitimate child of one of Thomas’s unmarried sisters, who died, which is why Marcus is clearly close to Thomas, shares the same surname, but not the Y DNA. In fact, it’s likely that Marcus was raised in Thomas’s household.

  • It’s entirely possible that if I incorrectly listed Thomas as Marcus’s father on Ancestry, as many have, that I would be placed in a Thomas circle, because Ancestry forms circles if your autosomal DNA matches and you show a common ancestor in your trees. This is why inclusion in a circle doesn’t genetically confirm an ancestor without additional information. It confirms a genetic relationship, but not how a person is related.
  • It’s entirely possible that even though Marcus’s Y DNA doesn’t match the proven Y DNA of Thomas, that Marcus is still closely related to Thomas – such as Marcus’s uncle. That’s why Marcus’s descendants match both Thomas’s and Alexander’s descendants through autosomal testing. However, without Y DNA testing, we would never know that they don’t share a paternal line.
  • It’s entirely possible that if Marcus was supposed, on paper, to be Thomas’s child, but was fathered by another man, such as his wife’s first husband, I would still be in the circle attributed to both Thomas and his wife, by virtue of the fact that I match DNA of Thomas’s descendants through Thomas’s wife. This is your classic step-father situation.

Paper is Not Proof

As genealogists, we became so used to paper documentation constituting proof that it’s a blow when that paper proves to be irrelevant, especially when we’ve hung our genealogical hat on that “proof” for years, sometimes decades.

The perfect example is an adoption. Today, most adoptions are through a court of law, but in the past, a functional adoption happened when someone, for whatever reason, took another child to raise.

The history of that “adoption” although not secret when it happened, became lost in time, and the child is believed to be the child of the couple who raised them. The adoption can actually be a step-parent situation, and the child may carry the step-father’s surname but his own father’s Y DNA, or it can be a situation where a relative or unrelated couple raised the child for some unknown reason.

Today, all paper genealogy needs to be corroborated by DNA evidence.

DNA evidence can be some combination of:

  • Y DNA
  • Autosomal DNA
  • Mitochondrial DNA

How Much Proof is Enough?

One of my favorite saying is “you don’t know what you don’t know.”

People often ask:

  1. If they match someone autosomally who shares the same ancestor, do they really need to prove that line through Y or mitochondrial DNA?
  2. Do they really need to match multiple people?
  3. Do they really need to compare segments?

The answers to these is a resounding, “it depends.”

It depends on the circumstances, the length of time back to the common ancestor, and how comfortable you are not knowing.

Relative to question 1 about autosomal plus Y DNA, think about Marcus Younger.  Without the Y DNA, we would have no idea that his descendant’s Y DNA didn’t match the Thomas Younger line. Suddenly, Marcus not being included in either Thomas nor Alexander’s will makes sense.

Relative to question 2 about matching multiple people, the first cousin we tested to determine whether it was me or my brother that was not the child of our father turned out to have different Y DNA than expected. Thank goodness we tested multiple people, including autosomal when it became available.

Relative to question 3 about comparing segments, every matching segment has its own unique history. I’ve encountered several situations where I match someone on one segment from one ancestor, and another segment from an entirely different line. The only way to determine this is by comparing and triangulating individual segments.

I’ve been bitten so many times by thinking I knew something that turned out to be incorrect that I want every single proof point that I can obtain to eliminate the possibility of error – especially multiple kinds of DNA proof. There are some things that ONLY DNA can reveal.

I want:

  • Traditional documentary evidence for every generation to establish the actual paper trail that proves that the child descends from the proper parents.
  • Y DNA to prove the son is the son of the father and to learn about the deeper family history. For example, my Lentz line descends from the Yamnaya culture, something I would never have known without the Big Y DNA test.
  • Mitochondrial DNA to prove that the mother is the actual mother of the child, if possible, not an unknown earlier or later wife, and to learn about the deeper family history. Elizabeth Mehlheimer’s mitochondrial DNA is Scandinavian – before her ancestors are found in Germany.
  • Autosomal DNA to prove that the paper lineage connecting me to the ancestor is correct and the line is not disrupted by a previously unknown adoption of some description.

I attempt to gather the Y and mitochondrial DNA haplogroup of every ancestor in my direct line if possible and confirm using autosomal DNA.

Yes, my personal proof standard is tough, but I suggest that you at least ask these questions when you evaluate documentation or see someone claim that they are “DNA proven” to an ancestor. What, exactly, does that mean and what do they believe constitutes proof? Do they have that proof, and are they willing to share it with you?

Genealogical Proofs Table

The example table below is designed to be used to document the sources of proof that the individual listed under the name column is in fact the child of the father and mother shown. Proofs may vary and could be personal knowledge (someone you knew within your lifetime), a Bible, a will, a deed, an obituary, death certificate, a church baptismal document, a pension application, census records, etc. DNA confirmation is needed in addition to paper documentation. The two types of proof go hand in hand.  

Name Birth Death Spouse Father Mother Proofs – Sources DNA Confirmed
William Sterling Estes Oct. 1, 1902, Claiborne Co., TN Aug. 27, 1963, Jay Co., IN Barbara Ferverda William George Estes 1873-1971 Ollie Bolton 1874-1955 Personal knowledge – William is my father and William George is my grandfather. Autosomal triangulated to multiple Estes cousins
William George Estes March 30, 1873, Claiborne Co., TN Nov. 29, 1971, Harlan Co., KY 1. Ollie Bolton

2.  Joyce Hatfield

3. Crocia Brewer

Lazarus Estes 1845-1918 Elizabeth Vannoy 1846-1918 1.  Will of Lazarus Estes Claiborne Co., Tn. Will Book 8, page 42

2.  Deed where Lazarus states William George is his son.  Claiborne Co., Deed Book M2, page 371.

3. My father’s personal knowledge and birth certificate

Autosomal triangulated to multiple descendants of both Lazarus Estes and Elizabeth Vannoy.
Lazarus Estes May 1845, Claiborne Co., TN 1916-1918, Claiborne Co., TN Elizabeth Vannoy John Y. Estes 1818-1895 Rutha Dodson 1820-1903 1. Personal knowledge of George Estes, now decd

2.  Deed here John Y. deeds all his possessions to his eldest son, Lazarus when he goes to Texas, Claiborne Co., Deed book B1, page 37.

Y DNA confirmed to haplotype of Abraham Estes, autosomal triangulated to descendants of Lazarus and Elizabeth and upstream ancestors through multiple matches on both sides.
John Y. Estes December 29, 1818, Halifax Co., VA Sept. 19, 1895, Montague Co., TX Rutha Dodson John R. Estes 1785/88-1885 Nancy Ann Moore c 1785-1860/1870 1. Family visits of his children in Tennessee

2. Census records, 1850, 1860, Claiborne Co., Tn. shows families in same household

Y DNA confirmed through multiple sons. Autosomal triangulates to several descendants through multiple lines of other children.
John R. Estes 1785-1788, Halifax Co. VA May 1885, Claiborne Co., TN Nancy Ann Moore George Estes 1763-1869 Mary Younger bef 1775-1820/1830 1. Halifax County 1812 personal property tax list where John R. Estes is listed as the son of George Estes and lives next to him.  Only 1 George in the county. Later chancery suit lists John R.’s wife’s name and location in Tennessee Y DNA confirmed through multiple lines.  Autosomal confirmed triangulation of multiple lines of his children and his ancestors on both sides.

If you’d like to read more about the difference between evidence and proof, and how to get from evidence to proof, check out this article, What is proof of family history? by my cousin, retired attorney, Robin Rankin Willis.

Proof is a Pain!

So now that we’ve discussed what proof is not, and what types of records constitute proof, you may be thinking to yourself that proof is a pain in the behind. Indeed, it is, but without sufficient proof, you may literally be doing someone else’s genealogy or the genealogy of an ancestor that’s not your own. Trust me, that’s infinitely more painful.

I hate sawing branches off of my own tree. If I have to do it, the sooner I make the discovery and get it over with, the better.

Been there, done that, and really, I don’t want the t-shirt.

There is never such a thing as “too much” proof, but there is certainly too little. We are fortunate to live in a time when not only are historical records available, but the record passed by our ancestors inside our very cells tells their story. Use every tool and every type of DNA at your disposal! Otherwise, you get the t-shirt:)

______________________________________________________________

Disclosure

I receive a small contribution when you click on some of the links to vendors in my articles. This does NOT increase the price you pay but helps me to keep the lights on and this informational blog free for everyone. Please click on the links in the articles or to the vendors below if you are purchasing products or DNA testing.

Thank you so much.

DNA Purchases and Free Transfers

Genealogy Services

Genealogy Research